
You need a ChatGPT Business, Enterprise, or Edu plan to both read and write through Hireflix. See OpenAI’s guide to custom MCP servers for details.
Connect with the MCP (recommended)
1
Open the Plugins page
Click Customize in the left menu (1), then Plugins (2). Click the Add button in the top right (3) and choose Add custom MCP server (4).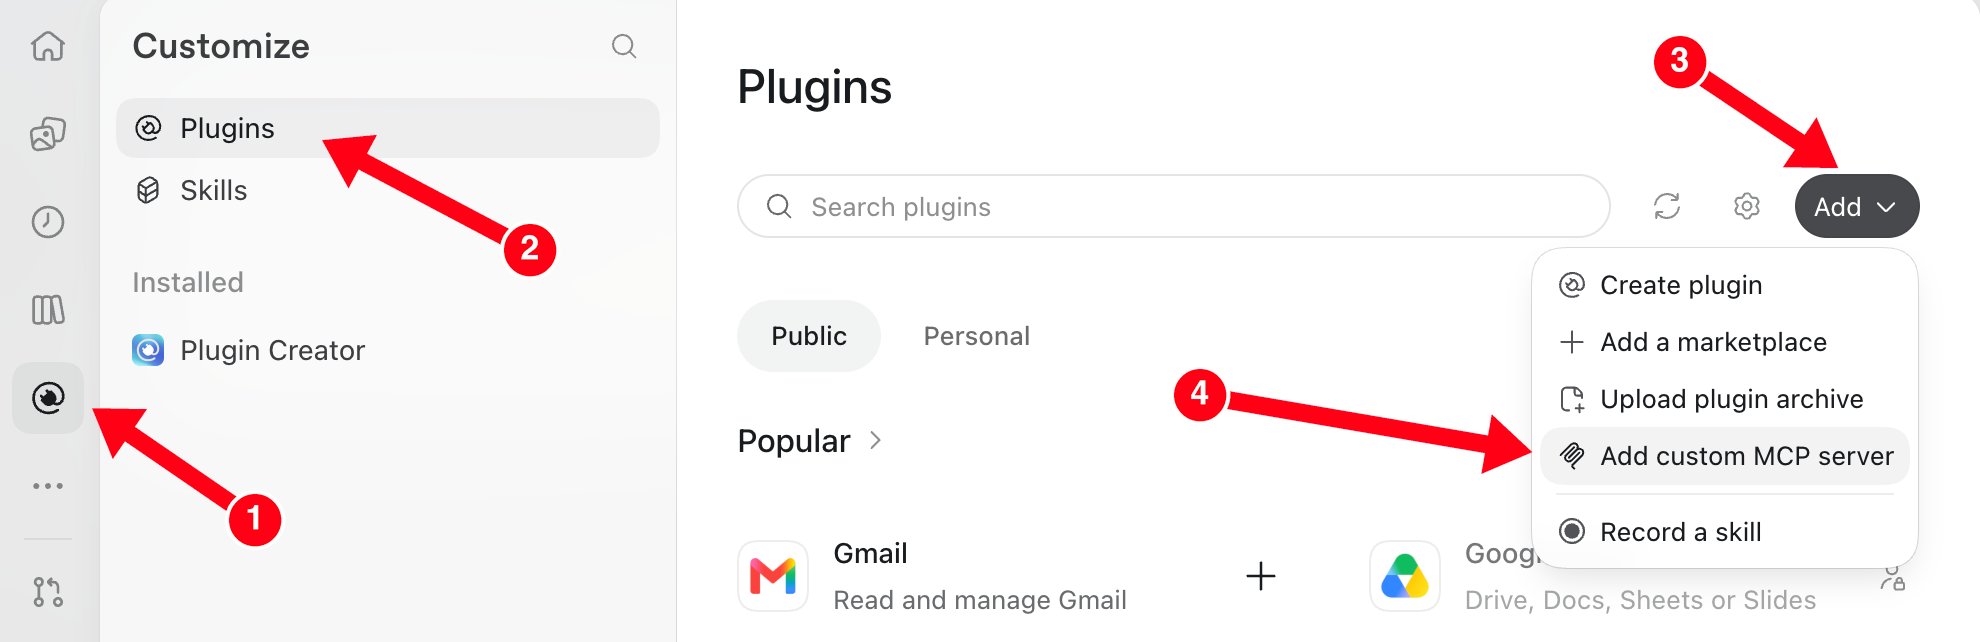
2
Enter the server details
Fill in the form: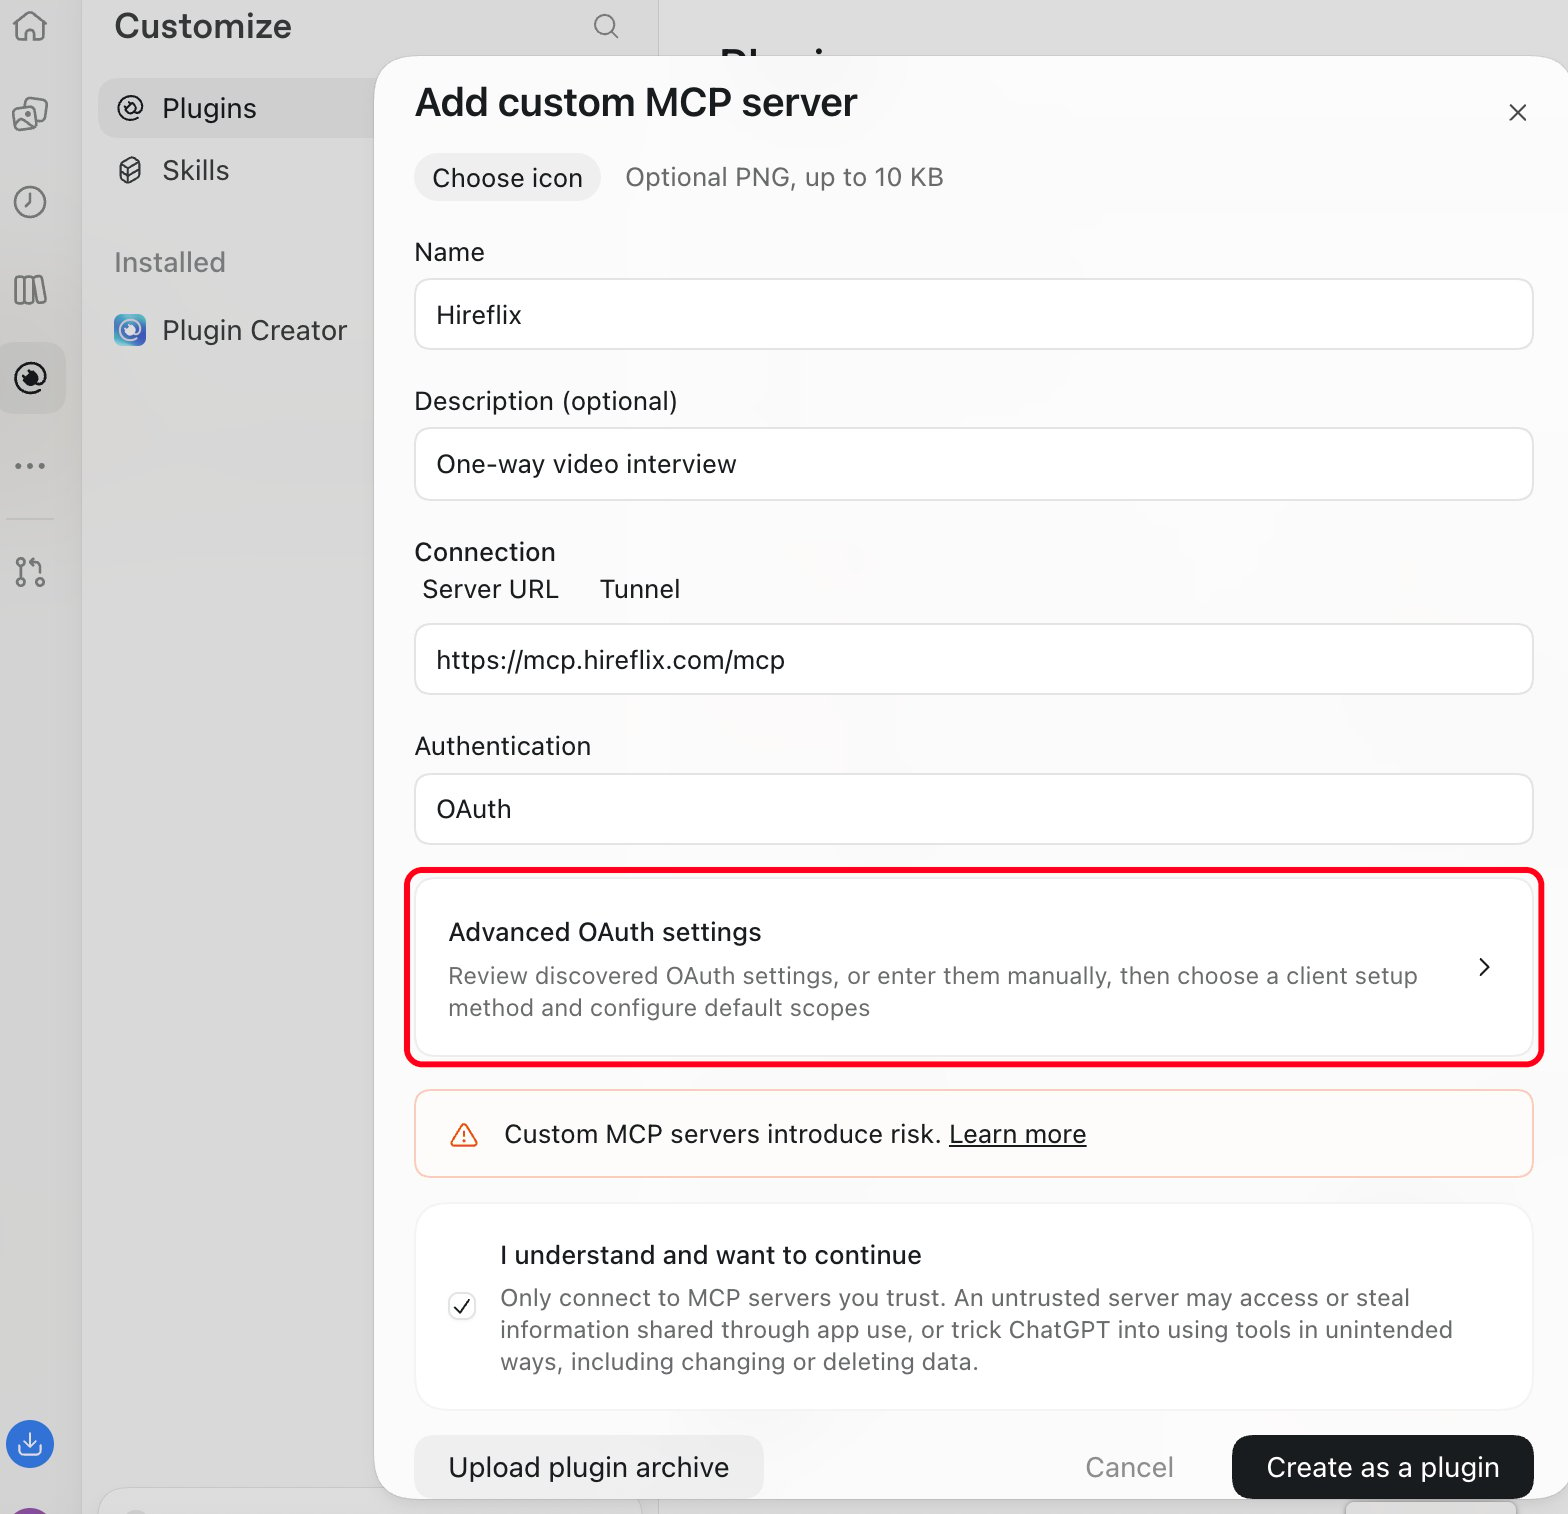
-
Name:
Hireflix -
Description (optional):
One-way video interview -
Connection: keep Server URL selected and enter the MCP server URL:
- Authentication: OAuth
3
Remove the extra OIDC scopes
With Advanced OAuth settings open (1), scroll all the way down in the pane on the right to OIDC scopes supported (2). Remove everything from the list except these two scopes:Leave the other settings as they are.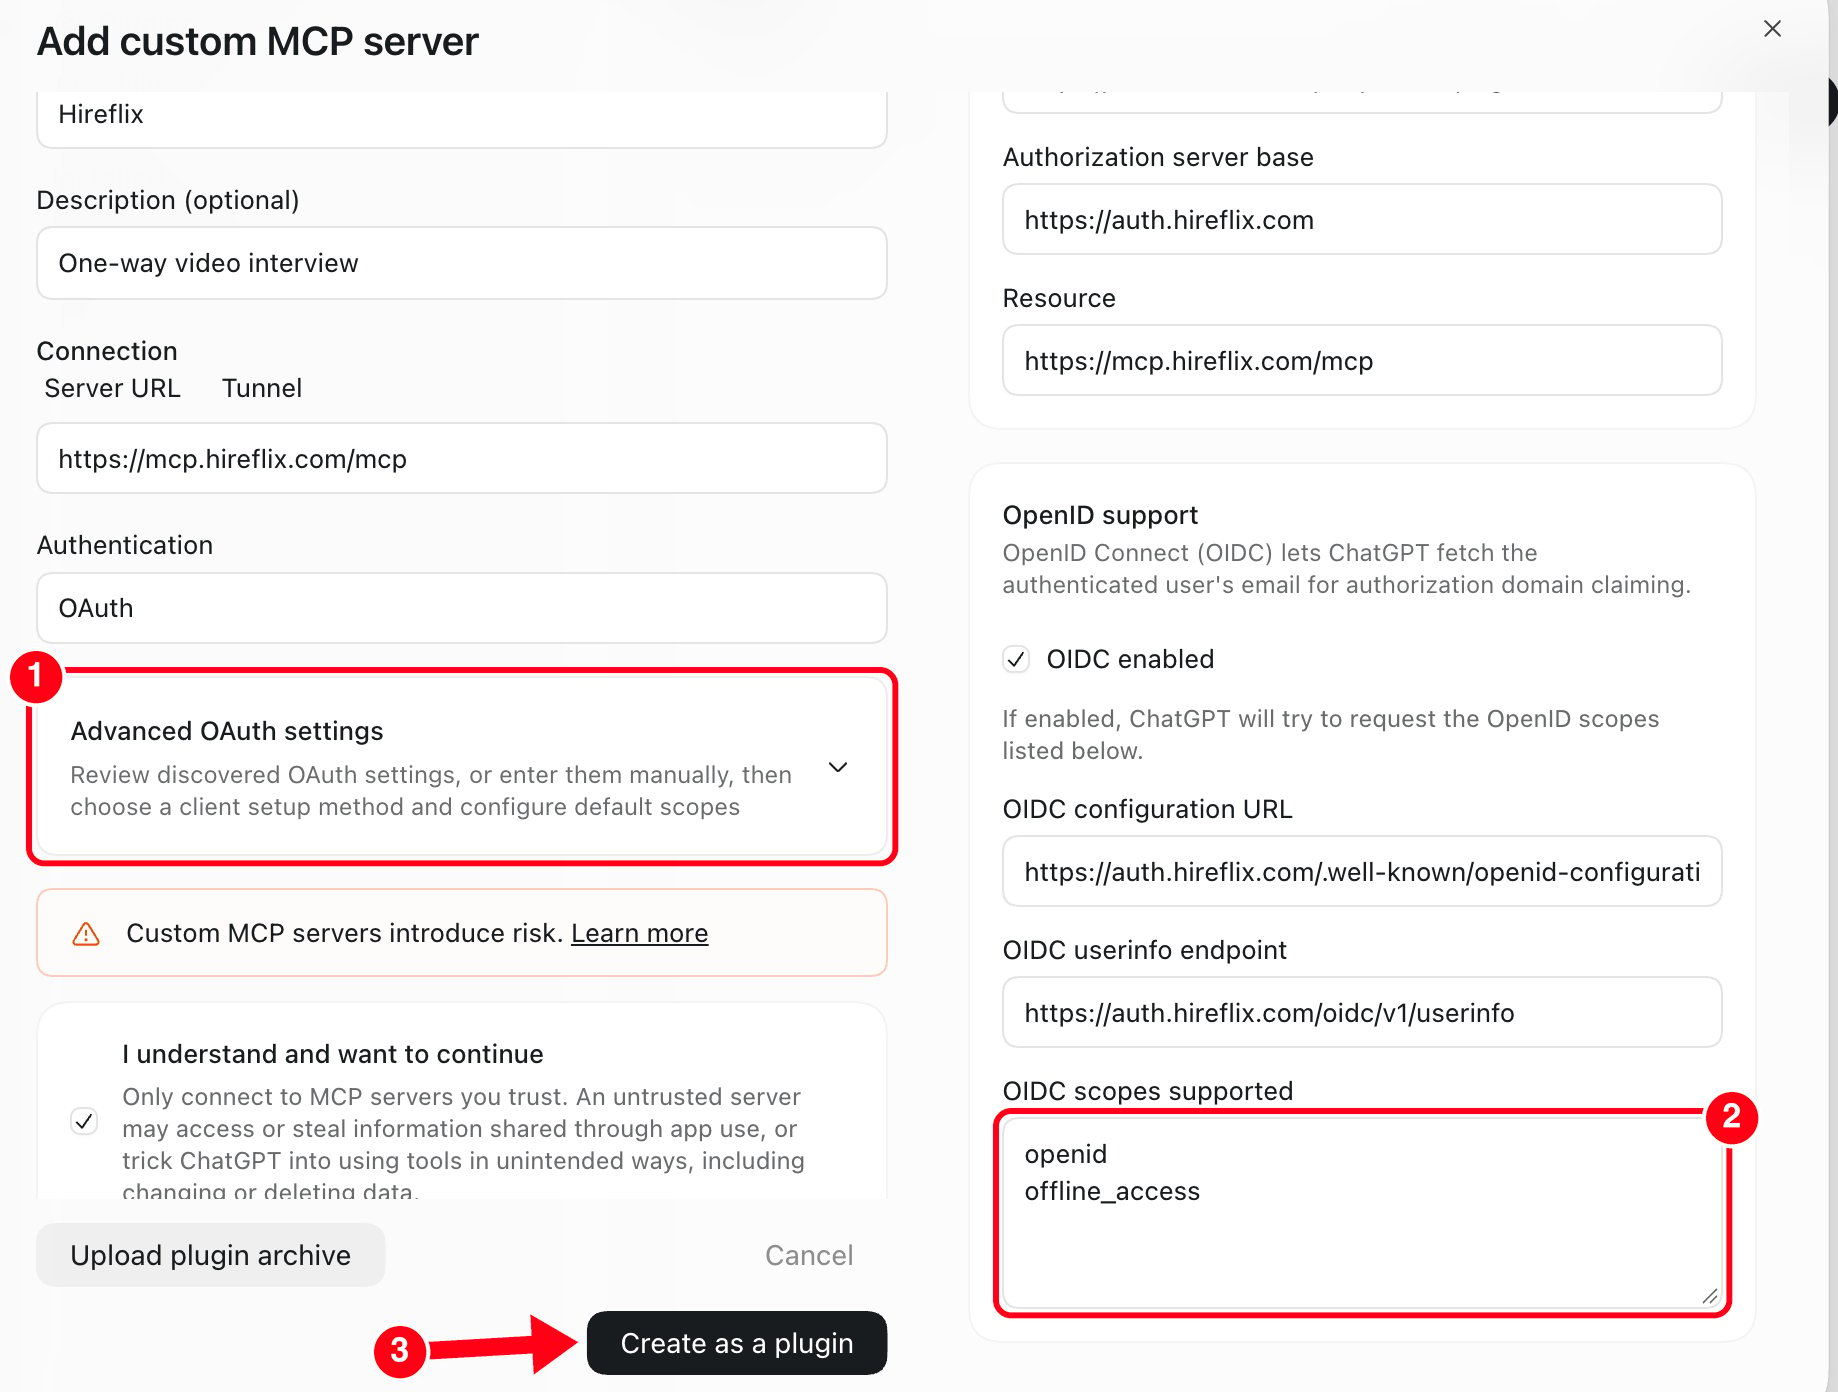
4
Create the plugin
Check I understand and want to continue, then click Create as a plugin (3 in the screenshot above).
5
Click Connect Hireflix
ChatGPT asks you to connect Hireflix. Read the information about how your data is shared, then click Connect Hireflix. ChatGPT redirects you to Hireflix.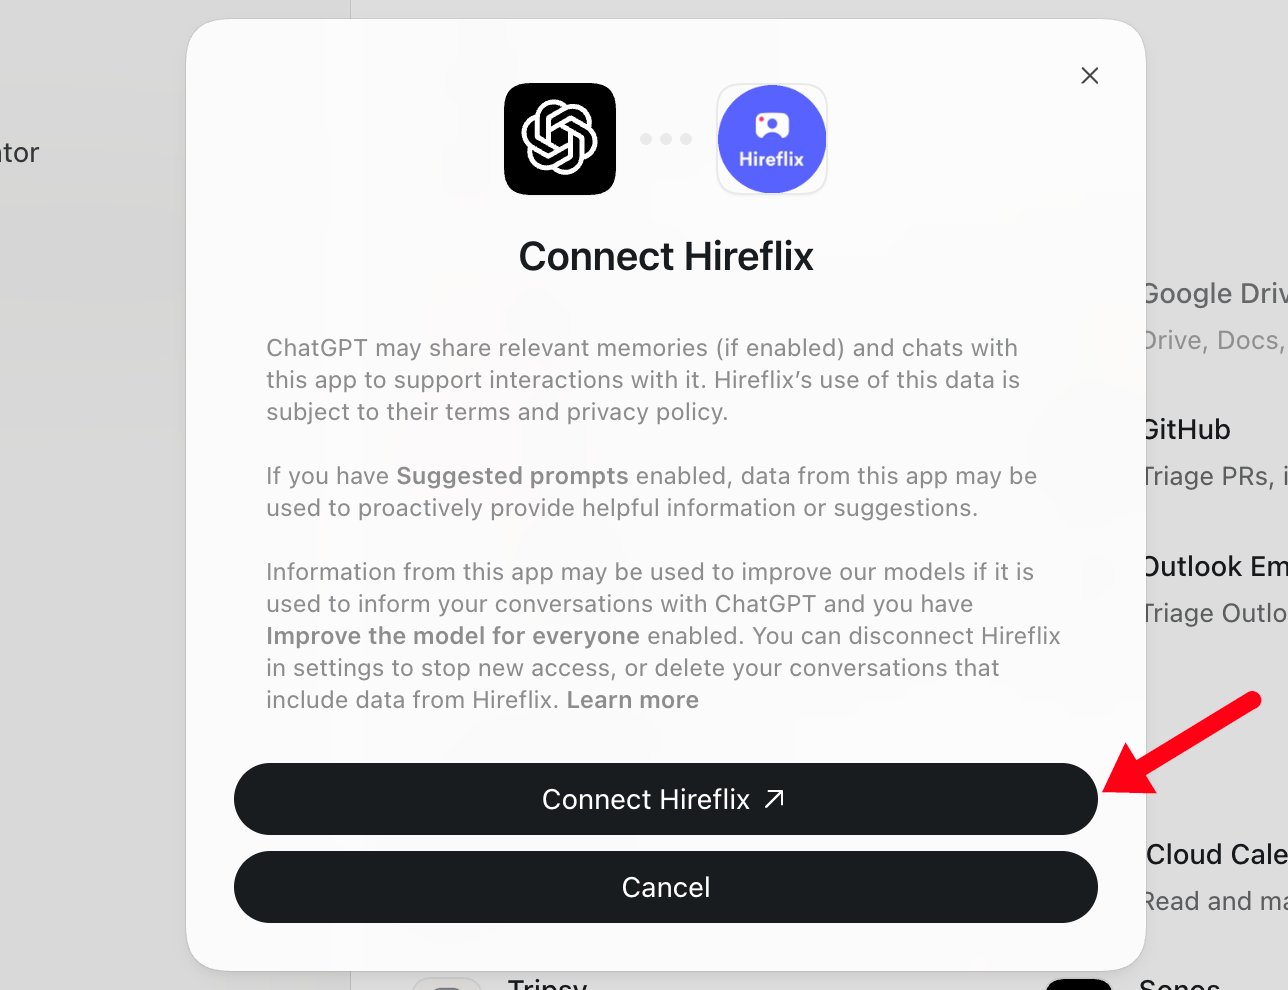
6
Allow ChatGPT to access your account
If you’re not logged in to Hireflix yet, log in first. Hireflix then shows what ChatGPT will be able to do for your organization. Click Allow to give it access. This lets ChatGPT: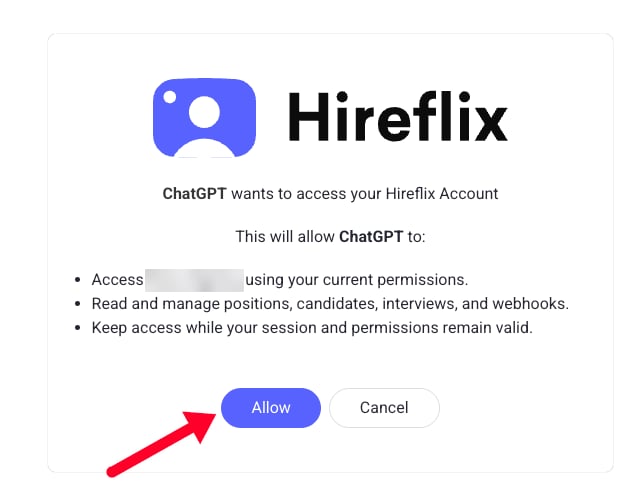
- Access your Hireflix account using your current permissions.
- Read and manage positions, candidates, interviews, and webhooks.
- Keep access while your session and permissions remain valid.
7
Check that the plugin is installed
Hireflix now appears under Installed in the Customize menu (1). Open it and click Try now (2). This opens a new chat with Hireflix already tagged.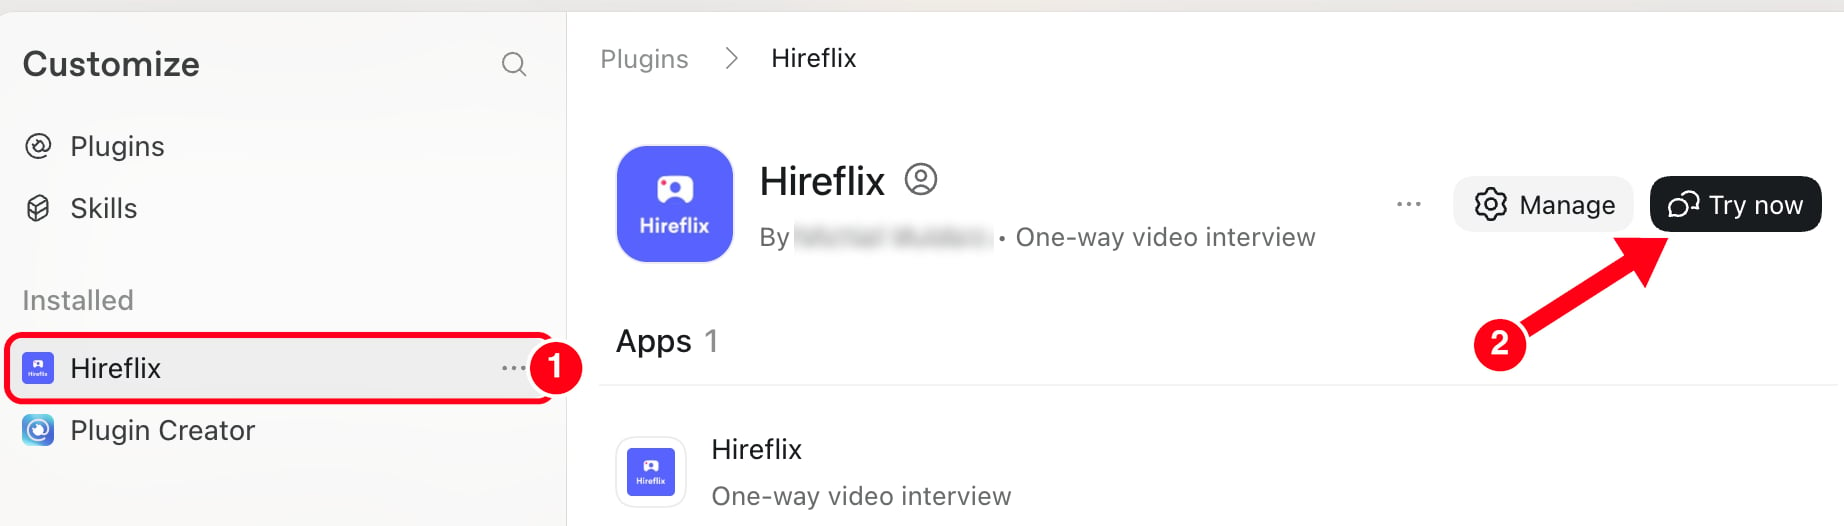
Use the skill
You need a ChatGPT Business, Enterprise, or Edu plan to use the Hireflix skill.
1
Start creating a skill
Click Customize in the left menu (1), then Skills (2). Click the Add button in the top right (3) and choose Create skill (4). This opens a new chat with Skill Creator tagged.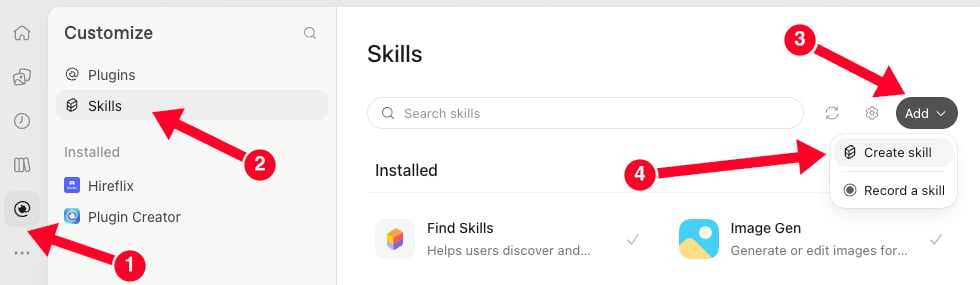
You might already see Hireflix under Installed in the left menu. That’s the plugin from the MCP tutorial, not the skill.
2
Paste the skill file and send the instruction
Open hireflixsl.mintlify.app/skill.md, copy the full contents, and paste them into the chat. They pop up as an attached file (1).Prefer working with a file? Save the page as 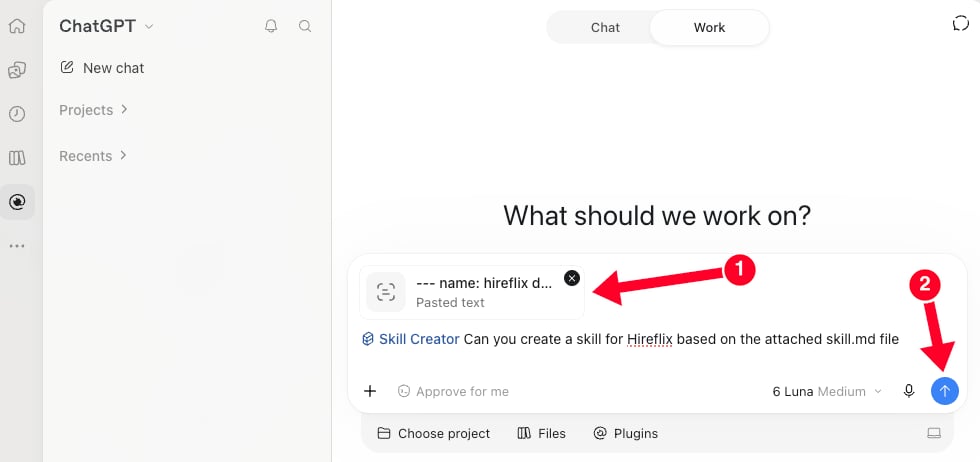
skill.md with CMD + S on Mac or CTRL + S on Windows, then attach that file to the chat instead. Copying the contents directly is usually easier.Then add this instruction and send your message (2):3
Wait for the skill to be created
Creating the skill takes around 30 seconds to a minute. ChatGPT tells you when the Hireflix skill is created and installed.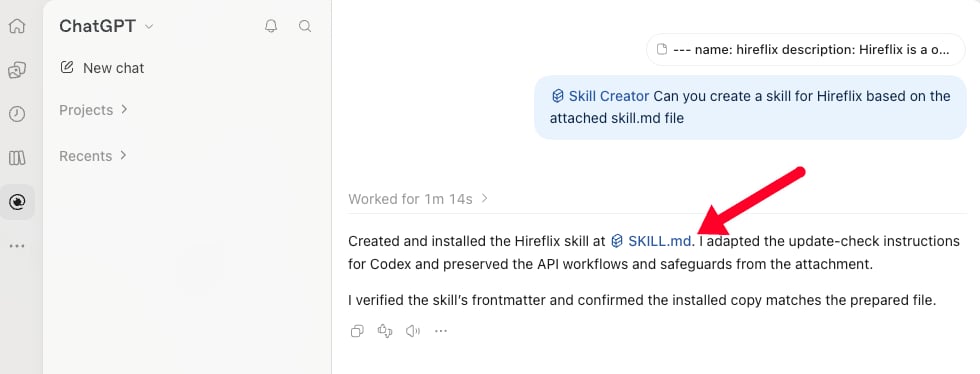
4
Open the skill
Go back to Customize → Skills, find Hireflix in the Installed list on the page, and click it.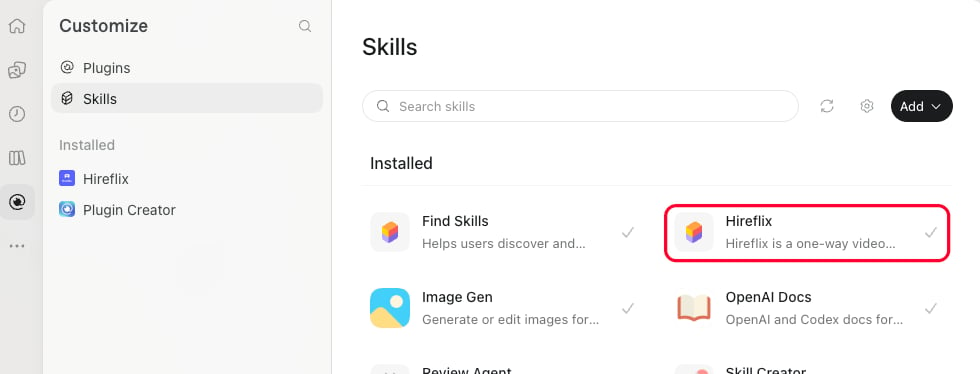
5
Click Try now
Click Try now. This opens a new chat with the Hireflix skill already tagged.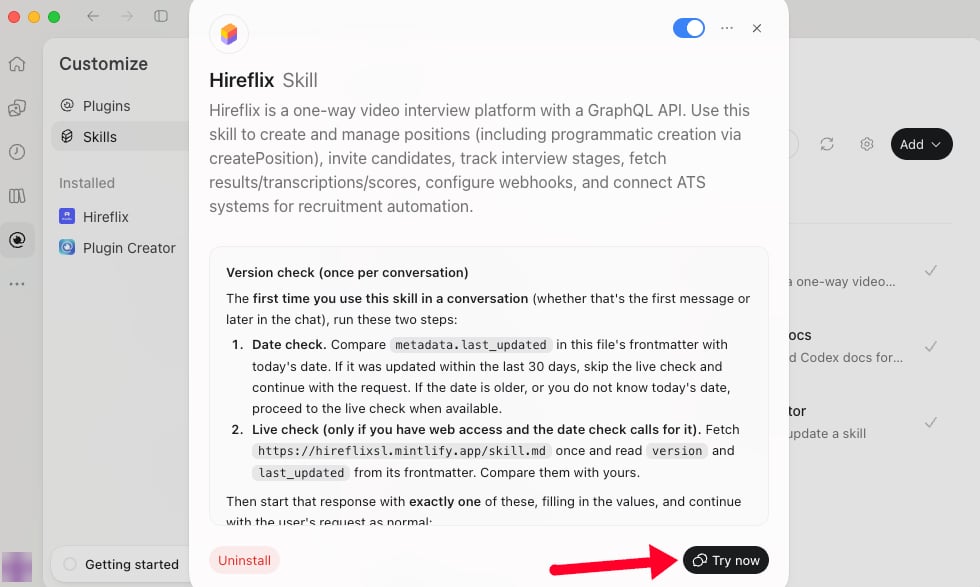
6
Add your API key and ask a question
You can now ask anything. With the skill tagged (1), give it your Hireflix API key the first time you use it (2). See the Quickstart if you still need to create one. For example: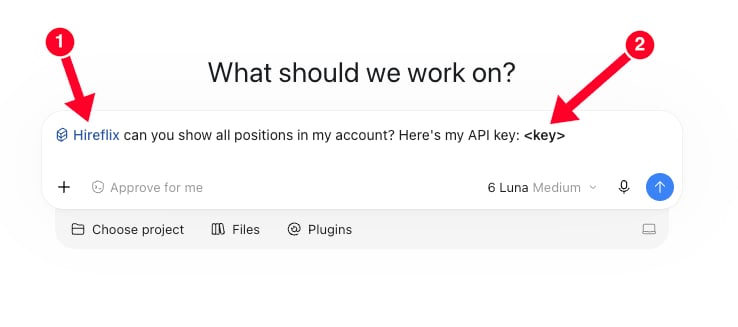
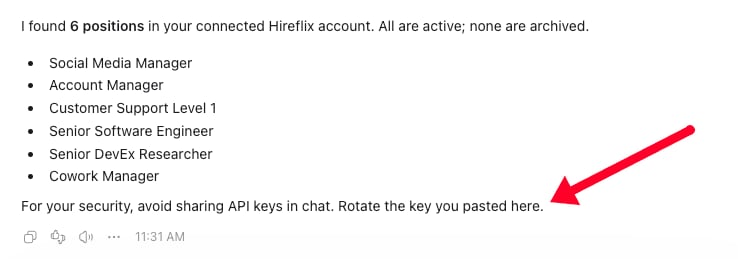
Try it out
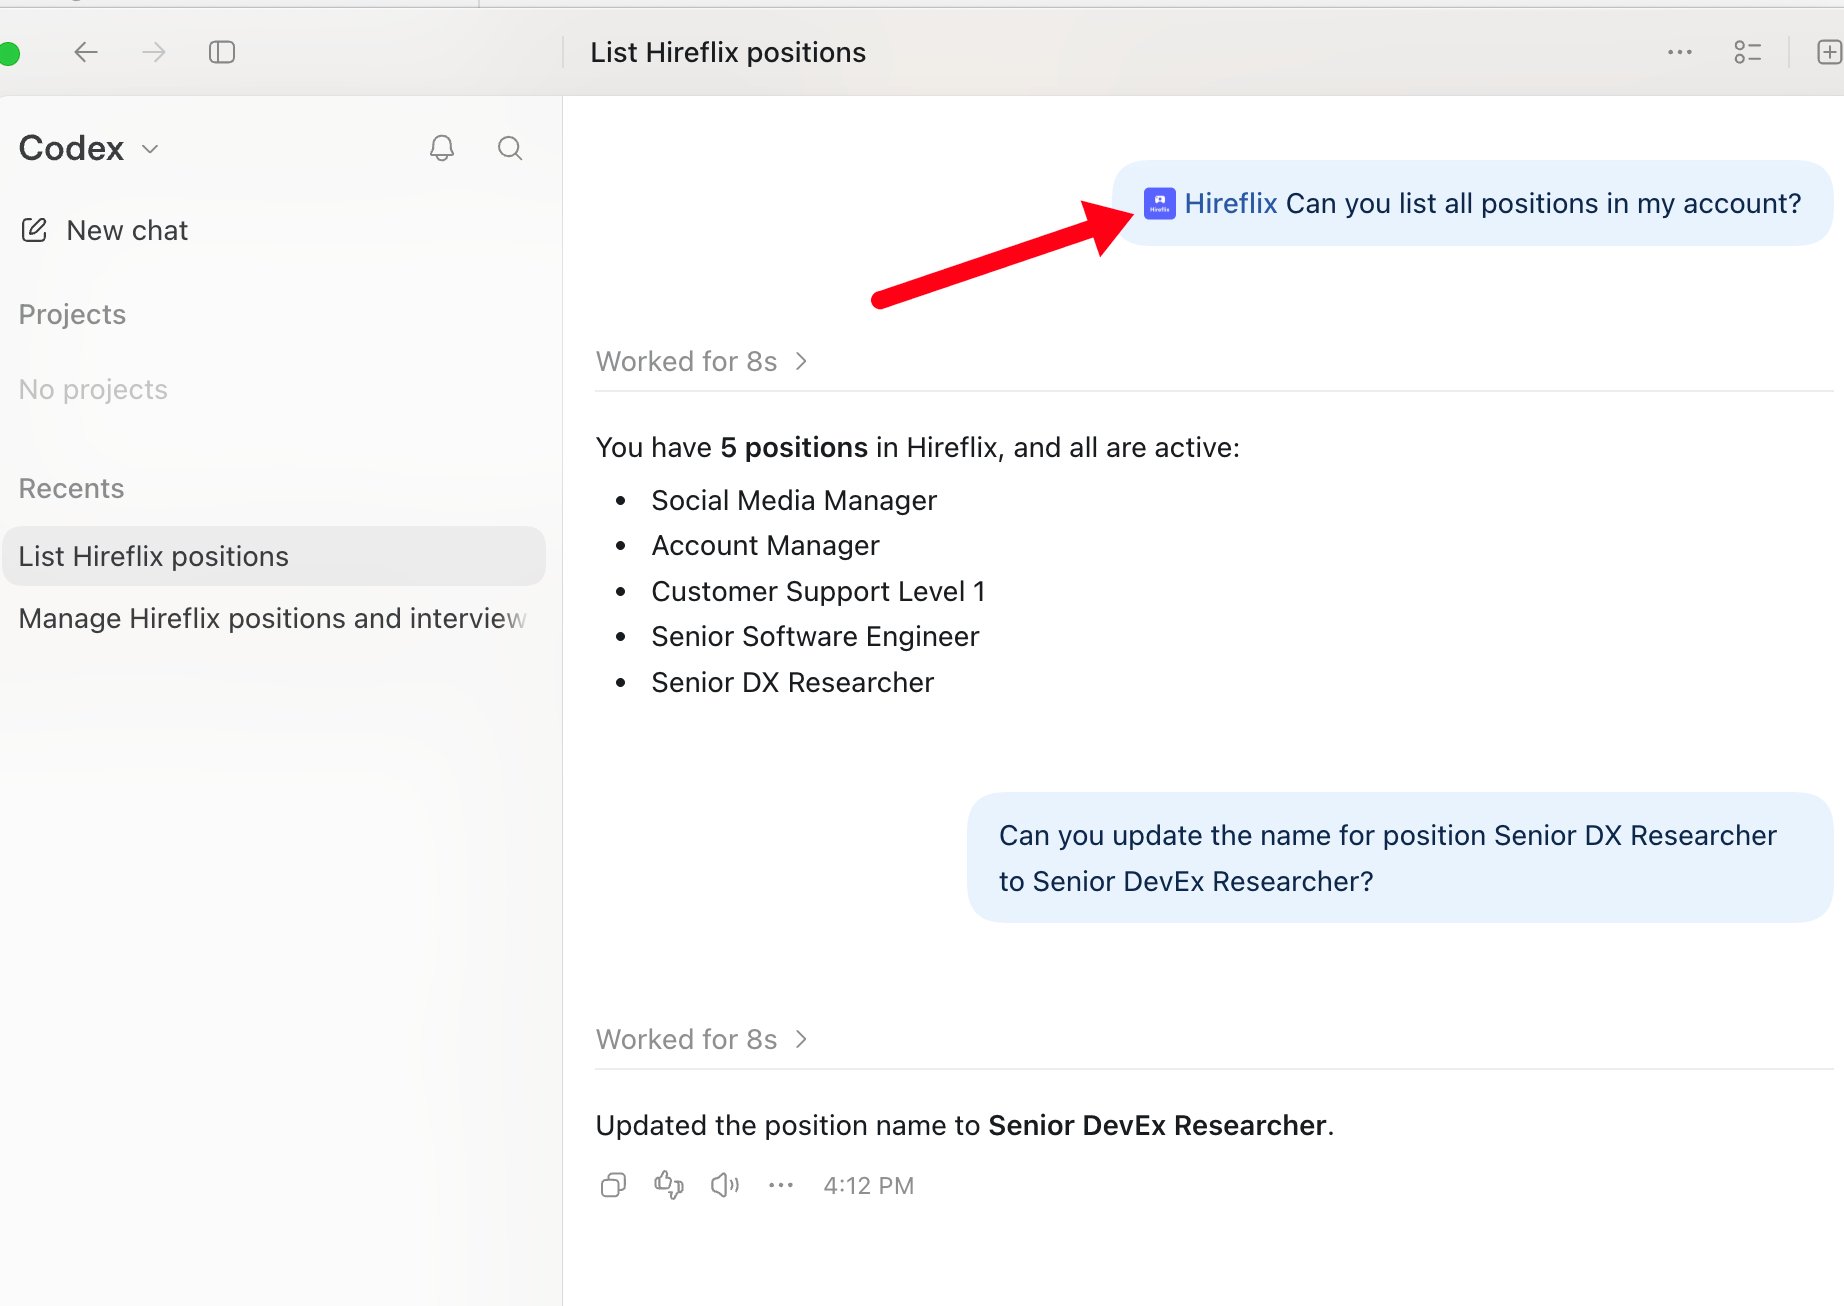
Open a new chat with Hireflix tagged (use Try now on the plugin or skill page) and ask: